Overview
In this article, we will review move ins and move outs.
Move a Resident In
Step 1: Navigate to the Resident you would like to move in and click the Housing Contract tab (this may be called something different based on your configuration).
 Step 2: Click Add New/Existing Housing Contract.
Step 3: Select the Care Type, Unit and Move-In Date as well as any other information and click Save.

Note: When adding a Housing Contract for the Prospect, if you would also like to add a Housing Contract for the spouse, check the box labeled Add Housing Contract for Spouse* at the bottom of the Add Housing Contract page. This will create a Housing Contract with the same Care Level, Floor Plan, Unit, and Move In Date for the spouse.
 Note: This checkbox will default as checked and only displays if the individuals have a relationship with the master type of Spouse.
Transfer a Resident
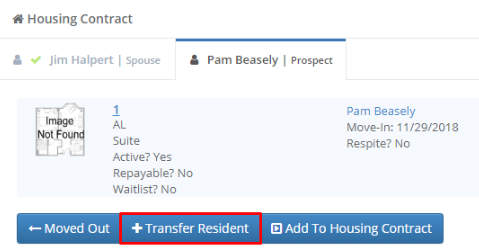
Step 1: Navigate to the Resident you would like to move into a different unit and click the Housing Contract tab (this may be called something different based on your configuration)
Step 2: Click Transfer Resident.
Step 3: Select the new unit for the Resident and enter any other information and click Save.

Note: By saving the new Housing Contract the old Housing Contract will mark the move out date as the move in date for the new unit. See below on how to Edit a Housing Contract.
Edit a Housing Contract
This option will allow a user to add a transaction to the unit if desired.
Step 1: Navigate to the Resident whose Housing Contract you would like to edit and click the Housing Contract tab (this may be called something different based on your configuration).
Step 2: Click the blue Action button to the right of Housing Contract and click Edit.
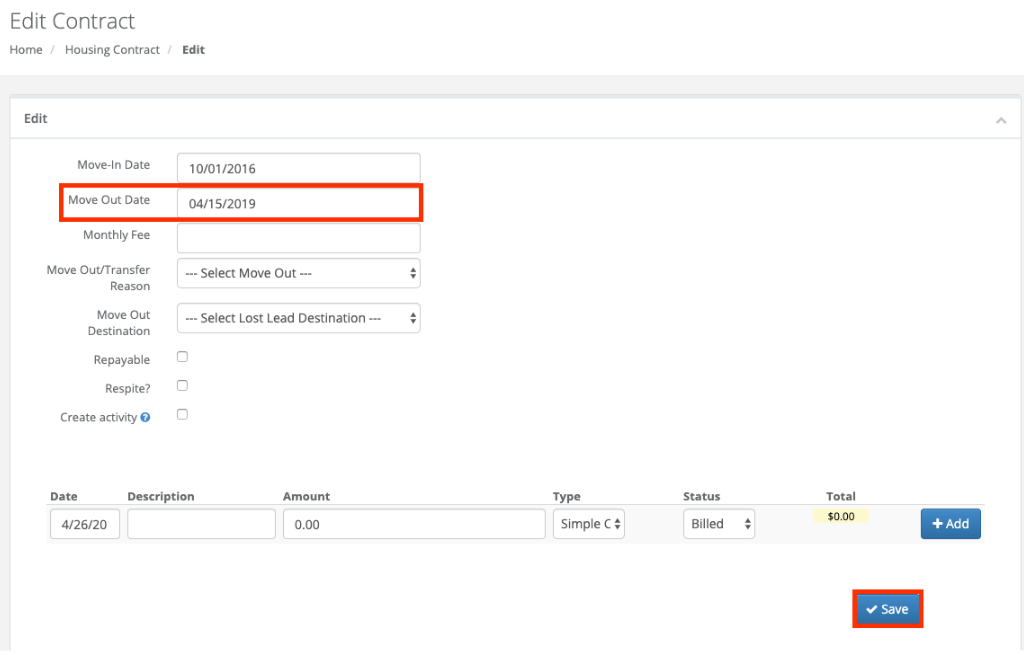
Step 3: Edit the information you would like and click Save.

Move a Resident Out
Step 1: Navigate to the Resident you would like to move out and click the Housing Contract tab (this may be called something different based on your configuration).
 Step 2: Click the blue Action button to the right of Housing Contract and click Moved-Out.

Step 3: Select a Move Out Date, Move Out/Transfer Reason (optional), and a Move Out Destination (optional) and click Save.
Note: The Move Out Destination field displays the same values as your Lost Lead Destination field, but is updated independently.
Note: Remember to mark Residents/Contacts that move out as Inactive by editing their profile and changing the status field.
Was this article helpful?
That’s Great!
Thank you for your feedback
Sorry! We couldn't be helpful
Thank you for your feedback
Feedback sent
We appreciate your effort and will try to fix the article