Overview
Waitlist within Enquire gives you the flexibility to track individuals who are on multiple waitlists at your location.
Waitlist Fields
The waitlist form will have fields for you to fill out to help best determine what an individual is looking for at your location.
| Field | Description |
|---|---|
| Date | The date the individual was added to the waitlist. |
| Care | The level of care needed for the individual. This field is displaying the same values as your Unit Care Groups |
| Floor Plan | The desired floor plan for the individual. This field is displaying the same values as your Unit Floor Plans |
| Preference | The desired preference for the individual. This field is displaying the same values as your Apartment/Unit Preference field (your company may have this named differently). You can edit or add options to this field by going to the Admin > Types section. |
| Status | This can be either Active or Inactive. Active indicates the individual is currently on the waitlist for the specified Care, Floor Plan, and Preference. Inactive indicates the individual is no longer interested in the specific Care, Floor Plan, and Preference or they have moved in. |
| Priority | The priority for the specified waitlist. This can be determined by a number of factors like current resident or employee family member. This is a new field added for our Waitlist module and you can add options for this field in the Admin > Types section. |
| Notes | A free form text field to enter any notes that pertain to that specific waitlist like a desired location with in the community or a unit facing a specific direction. |

Add an Individual to the waitlist
Step 1: Navigate to the profile for the individual you would like to add to the waitlist.
Step 2: Click the Waitlist menu item along the top of the profile.
Step 3: Click the grey + Add to Waitlist button.
Step 4: The individual is now added to the waitlist.

Note: The Date is required, is automatically filled out, and defaults to the current day when adding someone to a waitlist. Make sure you update this date field to the appropriate value for each waitlist addition.
Edit waitlist values
Step 1: Like fields on a profile, click on any field underlined with a blue dashed line or a field labeled Empty.
Step 2: Update the value and click the blue check mark to confirm your changes or click the grey X button to discard your changes.
Remove an individual from the waitlist
Step 1: Navigate to the individual you would like to remove from the waitlist.
Step 2: Click the Waitlist menu item along the top of the profile.

Step 3: To the right of any waitlist item, click the small red trash can icon and click the green check mark to confirm or click the grey X to cancel.


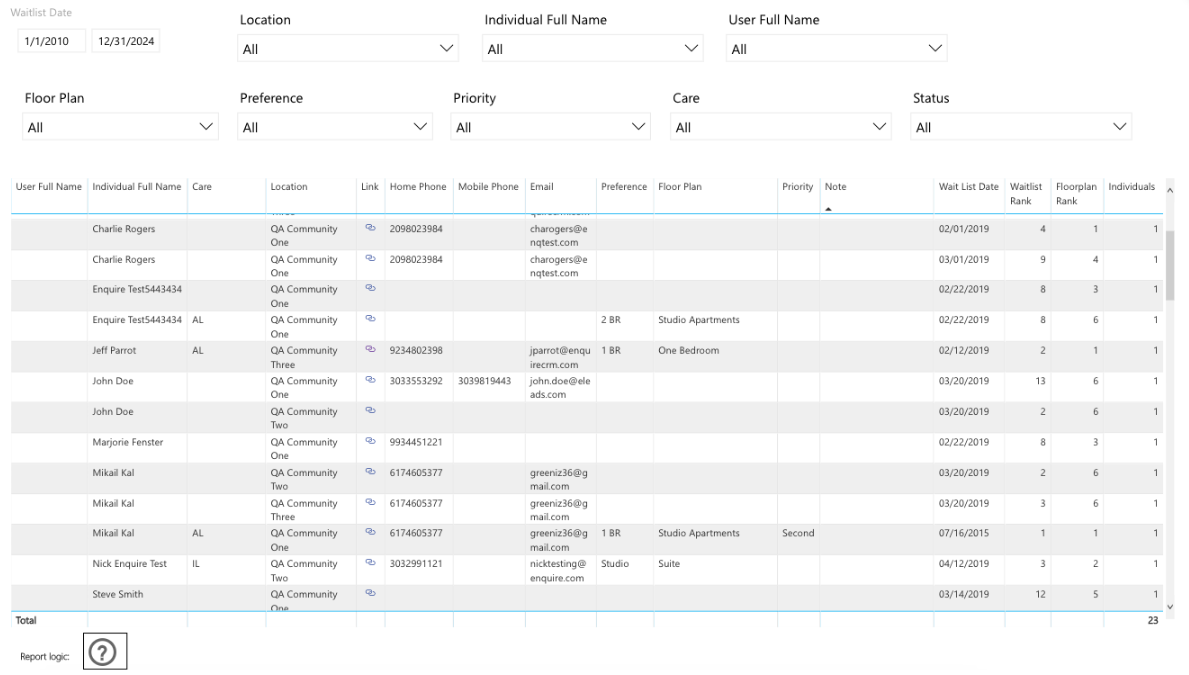
Waitlist Report
The Waitlist report is found in Enquire's Census Analytics and directly populates information from the Waitlist module.
Was this article helpful?
That’s Great!
Thank you for your feedback
Sorry! We couldn't be helpful
Thank you for your feedback
Feedback sent
We appreciate your effort and will try to fix the article