Overview
In this article, we will review how to:
ADDING A NEW USER
Step 1: Navigate to Admin on the left-hand navigational bar, then click User:
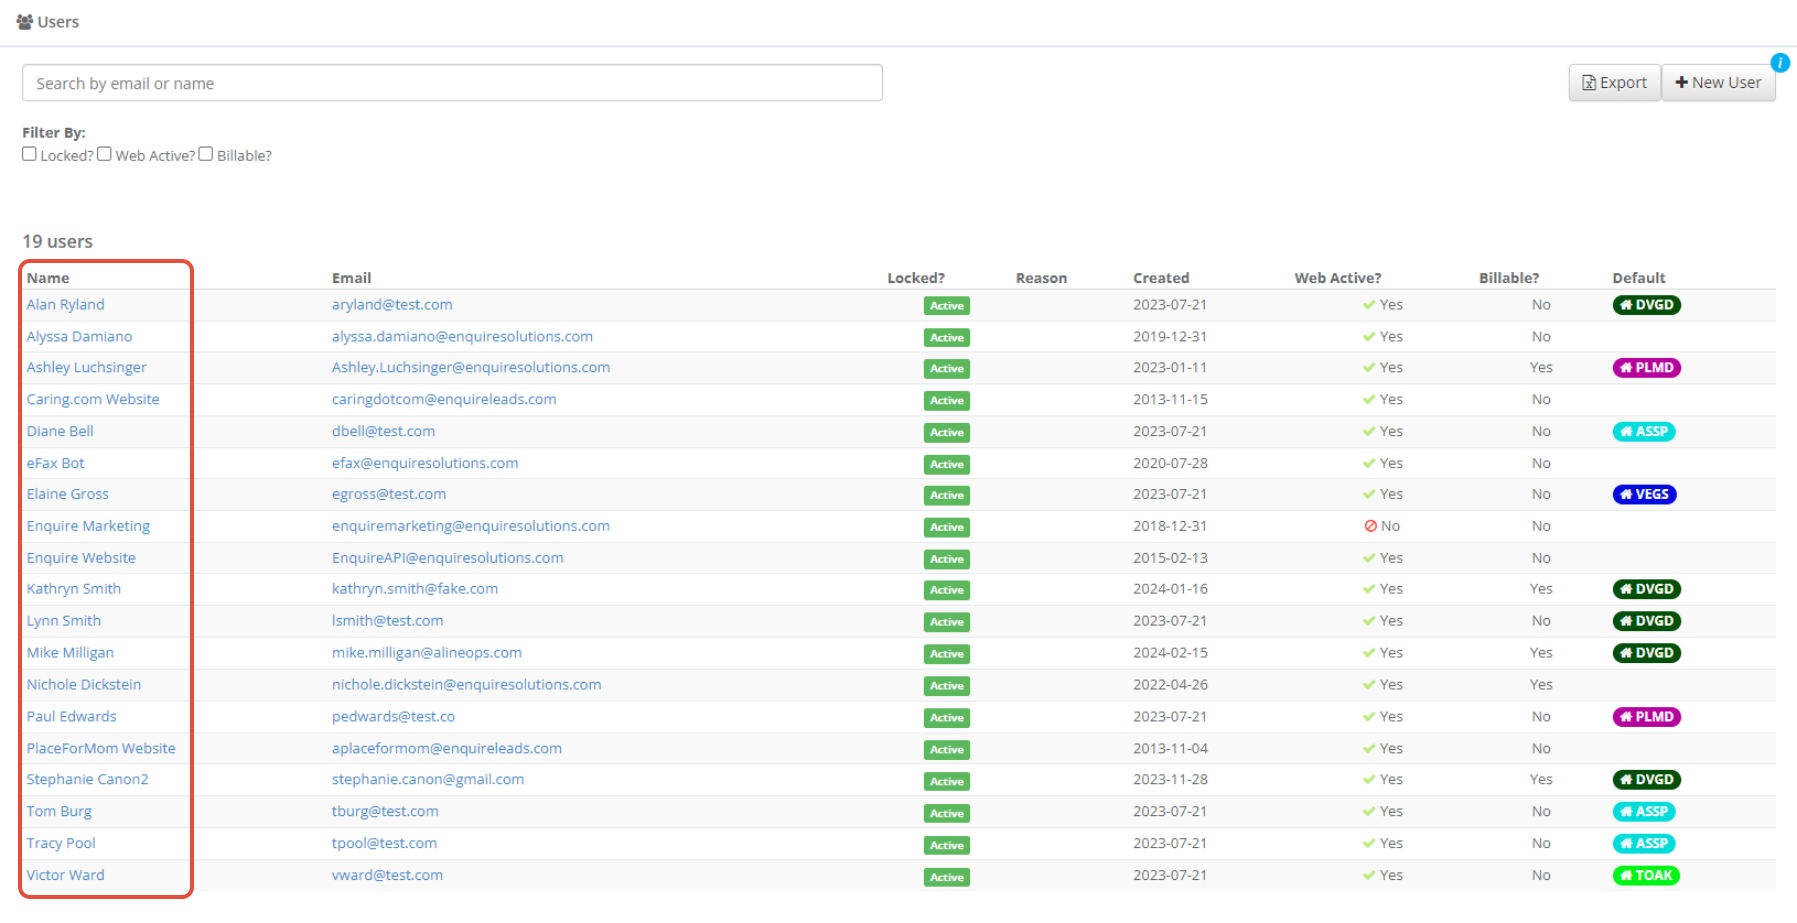
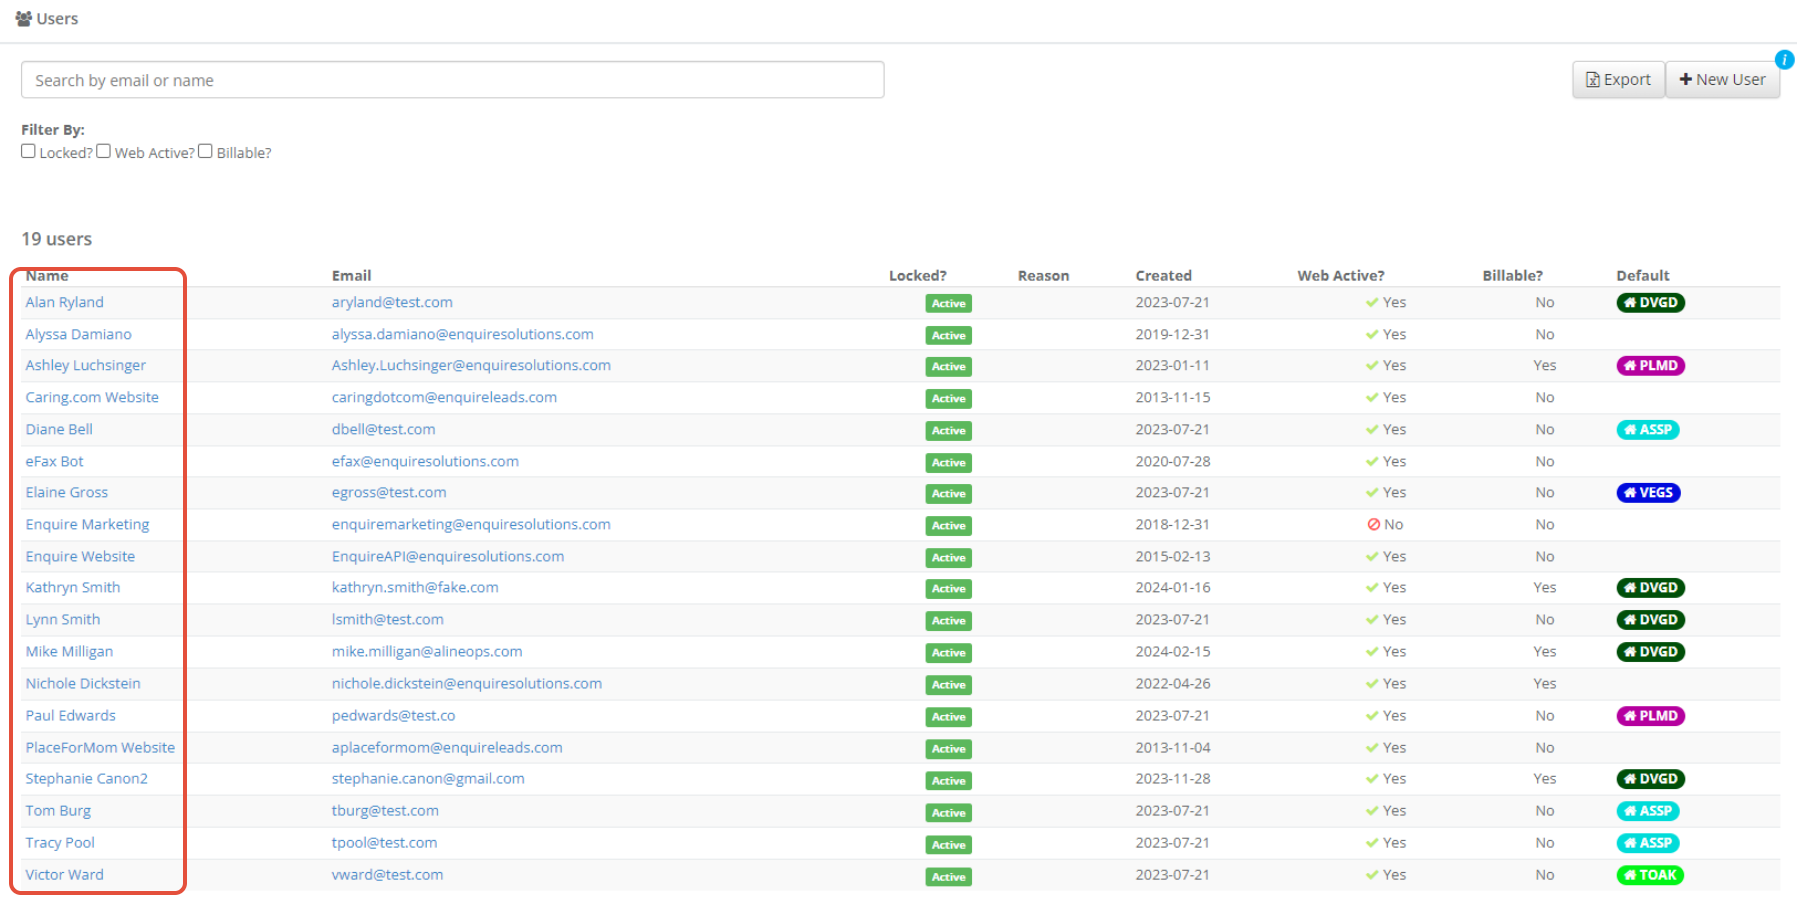
Step 2: Displayed will be a list of all Active and Locked out Users. Click on +New User in the upper right hand corner to add a new user:

Step 3: Once you have clicked +New User, you will be directed to the Create User page.
- Fill out the required fields:
- First Name
- Last Name
- Time Zone
- Billable - Defaults to be checked. This lets Aline know this is an active user.
- Web Active - Defaults to be checked. This allows users to assign leads and activities to this user. If user is to be in an administrative or view only role, please deselect this box.
- Default Community - Please know the location selected here will be default location when adding a new lead/prospect and will be the the location the user will be billed to.
- Contact If you utilize our Contact Center, please fill out the following fields in addition to the required:Title, Mobile Phone (ONLY if approved to call), Work Phone, Scheduled, and Support is needed as well. form with the new user's information and click save.

Step 4: After you have filled in the fields, click Save. This will create the user and send an email activation automatically that they can use to activate their account and create a password. The email will be coming from info@enquiresolutions.com and may need to check their Junk/Spam folders. This activation email is good for 42 hours once the user account is created.
Note: If the User is reporting troubles receiving the activation email, You are able to re-send it by clicking the blue Activate button.

If they continue experiencing issues receiving the activation email, please reach out to our friendly Support Team.
Step 5: After you have created the user, navigate to their user profile to ensure they have been assigned to all desired locations and have the appropriate user role. Continue reading below to learn how to take these steps.
MANAGING LOCATION ACCESS
Step 1: Navigate to Admin on the left-hand navigational bar, then click User:
Step 2: Navigate to the desired user.

Step 3: In the Locations Assigned section on the user profile, click the grey + Add Location button.

Step 4: Check the box next to the locations you would like to assign to the user or click the checkbox next to "Select All" to assign all available locations to the user. If you have a large number of locations, use the search bar along the top of the drop down to narrow the list of available locations. Click the green Save button.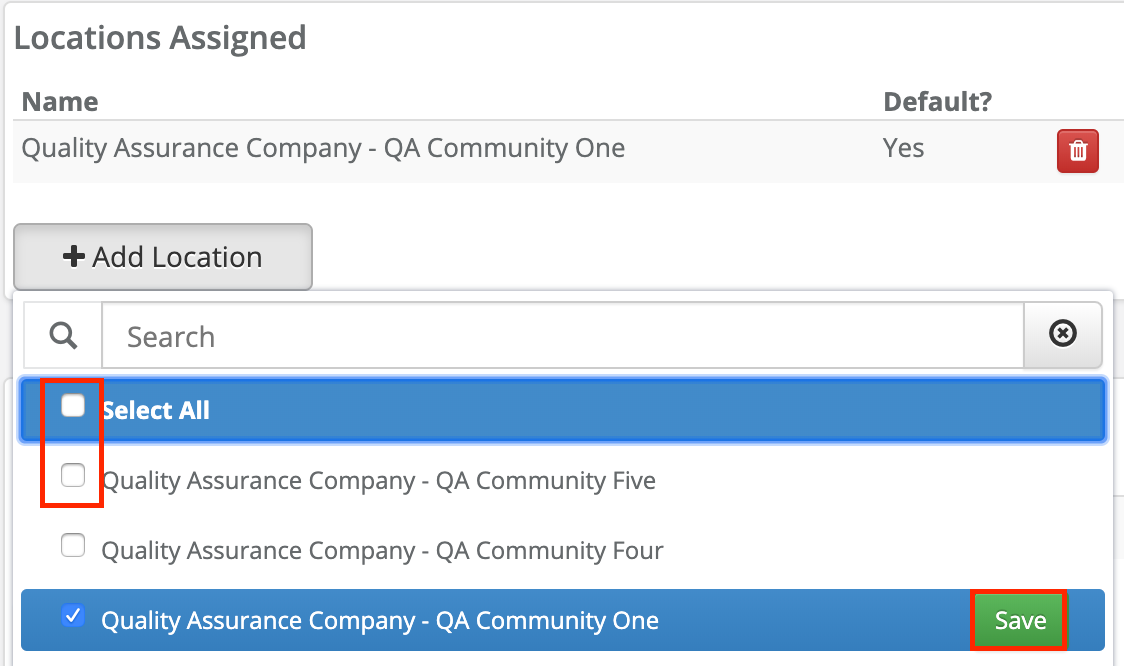
Note: When adding more than one location to a users profile, the system will ask what the default community is. The default community is where the user is billed to and what the user will see first in the drop-down and upon logging in.
MANAGING USER ROLES
Step 1: Navigate to Admin on the left-hand navigational bar, then click User:
Step 2: Click on the user you would like to add a role to.
Step 3: On the user profile, click +Add Role in the Roles section.

Step 4: From the pop-up window, select the appropriate Role you want to add to the user.

Step 5: Click Save.
Note: If you are updating a users role make sure to remove the old role by clicking the red trashcan next to the role on the user's profile to maintain accurate user role access.
Note: if you need to understand a user role permissions prior to assigning to a user, read our article on Managing Role Permissions.
EDITING A USER ACCOUNT
Step 1: Navigate to Admin on the left-hand navigational bar, then click User:
Step 2: From the list of users, choose the user that you would like to edit:

Step 3: On the user profile of the selected user, click the Edit button in the top right hand corner of the screen:

Step 4: Make desired changes and click Save.
MANAGING USER ACCESS TO THE CRM
Locking Out a User
Locking out a user will remove this user's access to the Aline CRM. When locking out a user, also consider reassigning their assigned individuals and activities. Unsure how to do this? Read our article: Reassign Leads and Activities.
Step 1: Navigate to Admin on the left-hand navigational bar, then click User:
Step 2: From the list of users, choose the user that you would like to Lock Out:
Step 3: On the user profile of the selected user, click the Lock Out button in the top right hand corner of the screen:

Step 4: Back on the Users page, this will show the individual as Locked Out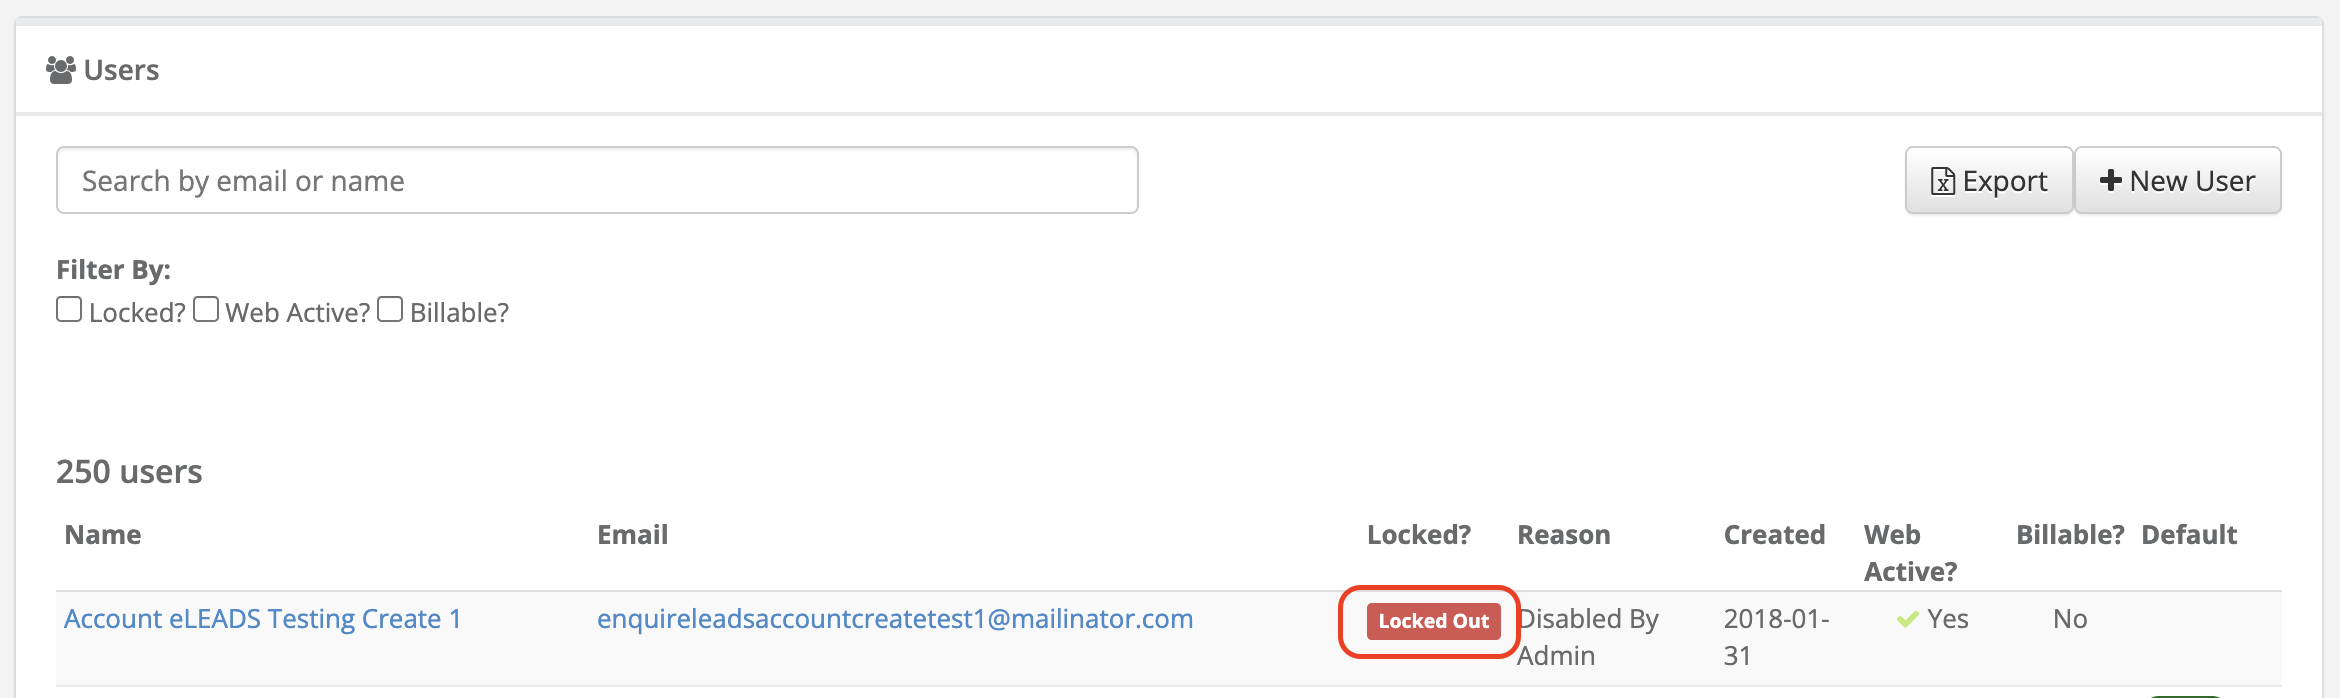
Note: You can filter for locked out users by checking the filter Locked? or you can choose to export a list of all users to see their status of Locked Out or Active.
Unlock a User/Activate User Access
Step 1: Navigate to Admin on the left-hand navigational bar, then click User:
Step 2: From the list of users, choose the user that you unlock/activate access for:
Step 3: On the user profile, click the Enable User button in the top righthand corner

Note: If an activation is needed, you can click the Activate button after enabling the user.

QUESTIONS?
We're happy to help! Please reach out to our Aline Support Team at enquire.support@alineops.com.
Click the "back/menu" buttons to explore more Help Center articles

Was this article helpful?
That’s Great!
Thank you for your feedback
Sorry! We couldn't be helpful
Thank you for your feedback
Feedback sent
We appreciate your effort and will try to fix the article